Our kitchen and farm table reveal

You may often hear “reveal/details coming soon!” on my Instagram stories whenever I show something in our house that’s a work in progress. You may also often find that “coming soon” typically means like 2 years later, such as our farm table and kitchen 😂

Two years ago, after realizing the farm tables I wanted for our eventual dining space were no less than $4,000, I came to my husband with the doe eyes and inquired about building one for us instead.
My husband has always expressed a desire to make furniture as a side or retirement job, so it was convenient we could fill a need (a dining table) while also investing in a machine for future projects/jobs. This machine, called a Jointer, “plains” wood boards to make them completely flat, even, and sanded. It also does other fancy things I’m not qualified to talk about.
It was a completely new tool to him, required some special electrical work done to our house/circuit panel, and just an overall huge learning curve that took a few months to get the hang of.
Once he built the whole thing out, the ball was in my court to stain and coat the table in polyurethane. It took a few weeks researching different types of stains, polys, and methods for applying both. At some point the holidays happened, then we all got COVID, then Flu A, and by then it had completely left my “to do list,” replaced by furnishing the kids’ new “big kid rooms” and the office.


It’s so rewarding to finally see it in its home - a labor of love that will be a true heirloom for our kids someday, if they want it.
The top of the table was made from White Ash wood, which has an incredible grain. The bottom was made from a reclaimed Fir beam he got from a job site. The Fir ended up presenting a little more red than the top, so to get a consistent, natural look, I actually had to coat the bottom in like 10+ coats of straight up laundry bleach. It took a lot of the red right out and made them match much better once stained.
We will (hopefully) have an additional post specifically on the table at some point to go into more details of its build.
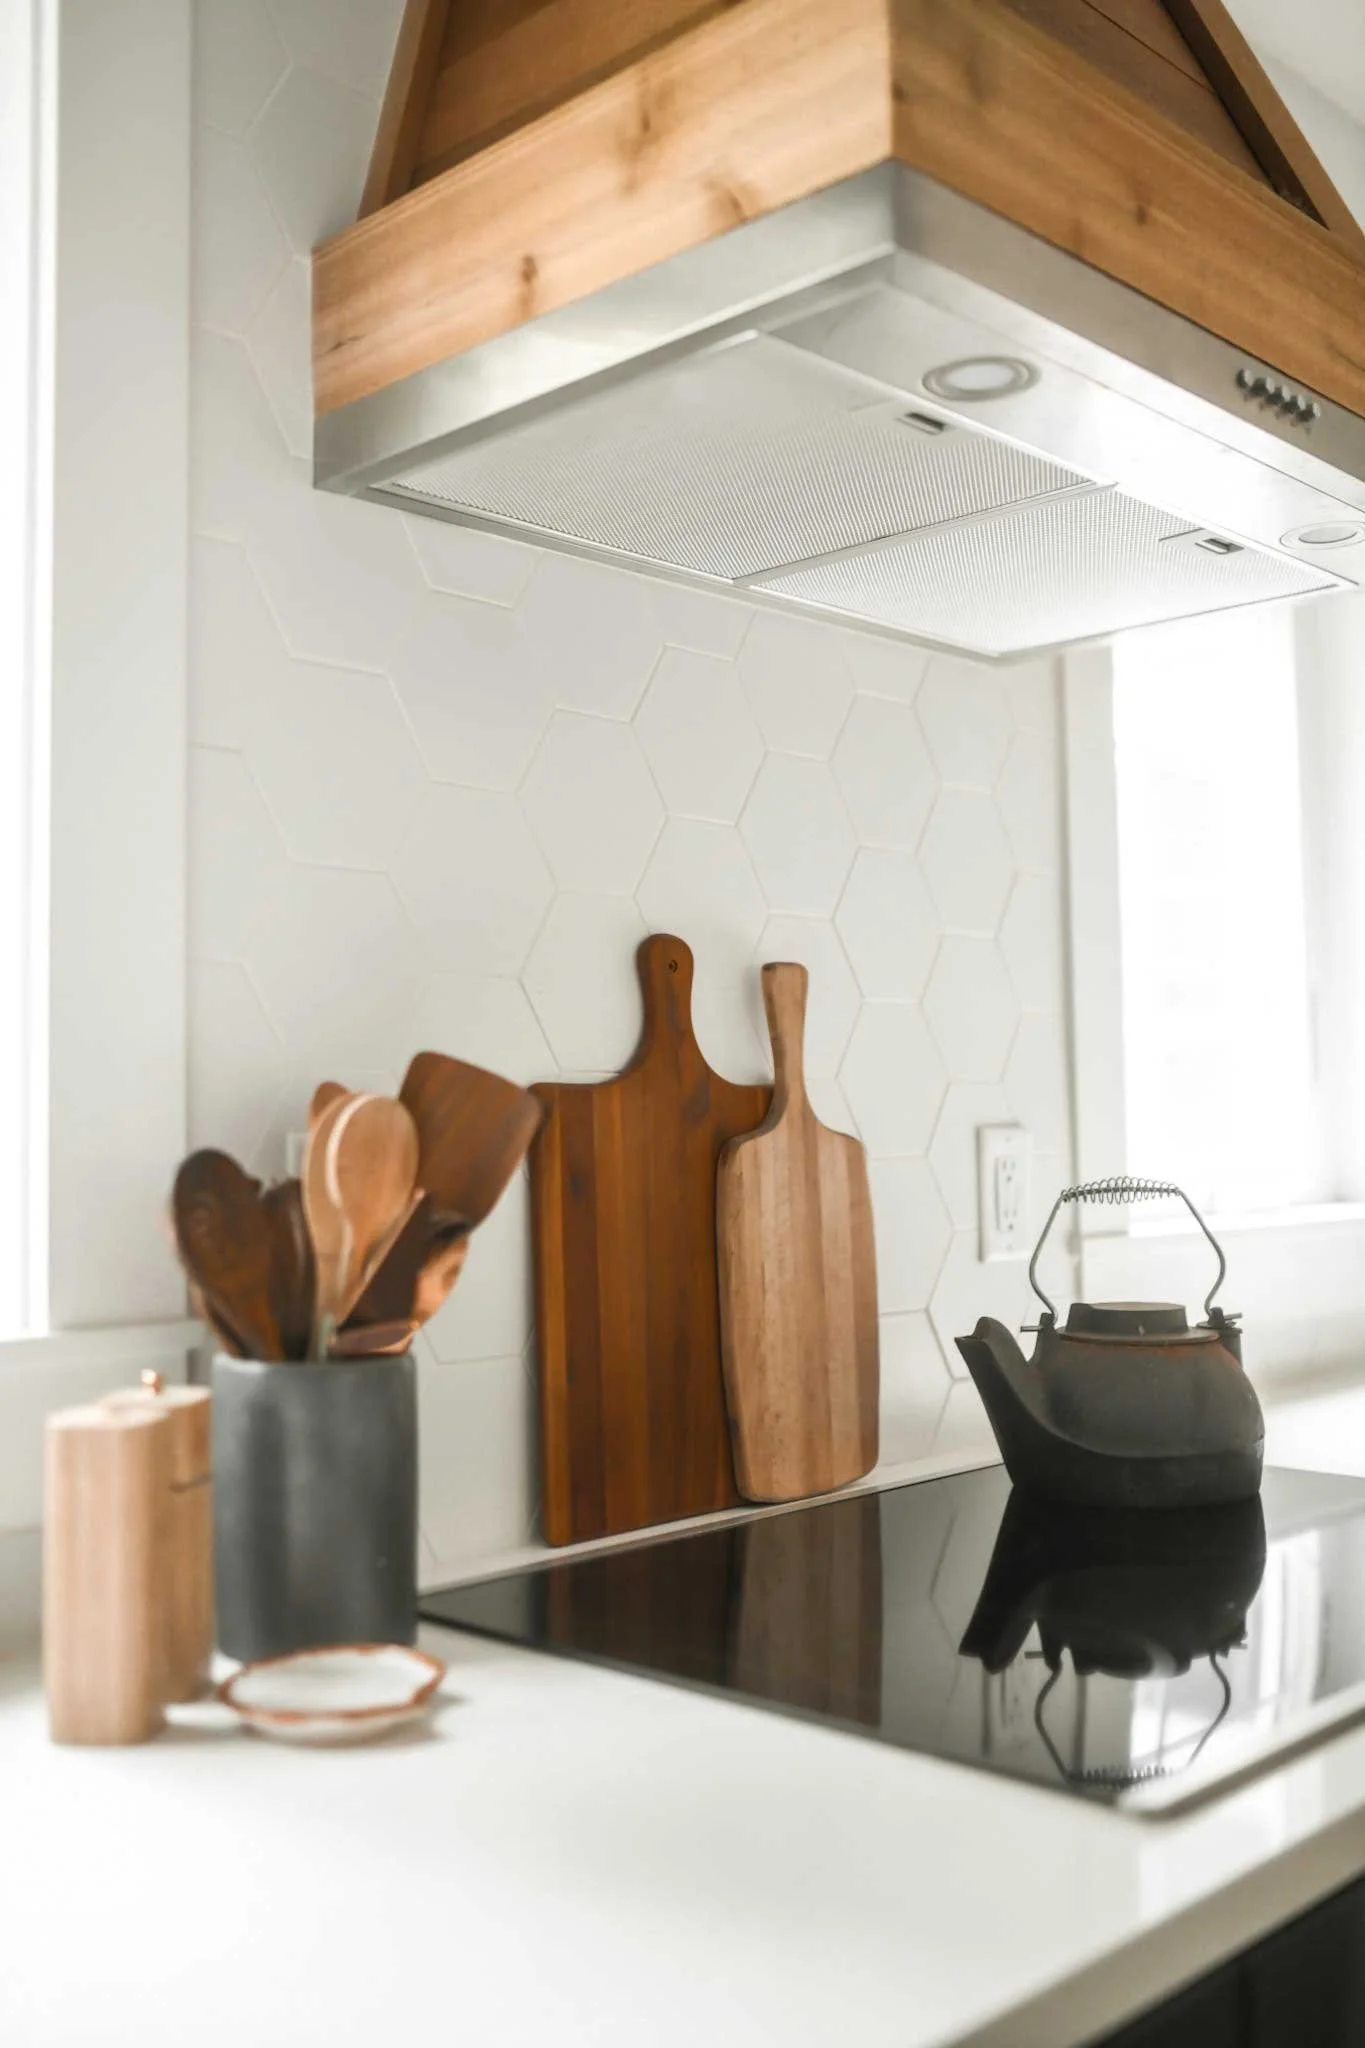
While the table was in production, we also made some progress on finishing the entire kitchen as well. Baseboard was added around the island and underneath the cabinets, the stove hood my husband crafted out of scrap wood was built, and lastly, the honeycomb tile backsplash was added.
I went back and fourth between honeycomb or regular subway tile. I feel as though subway is a bit more timeless, but the honeycomb was just so fitting for the aesthetic and “theme” of our house in general. Plus, it can always be changed down the road if we feel it needs updating. For now, though, I’m obsessed.

Whenever I show any photos of the kitchen, the first question I always get is about the color of my cabinets. Unfortunately, I’ve never had an answer because they were actually manufactured this way. We did, however, use the color matcher tool at Sherwin Williams to have them make a replica paint that we used for the baseboards. It was almost an exact match, and the slight difference is not even noticeable.
Here’s a picture of the numbers on the top of that can for anyone interested in giving it a try.

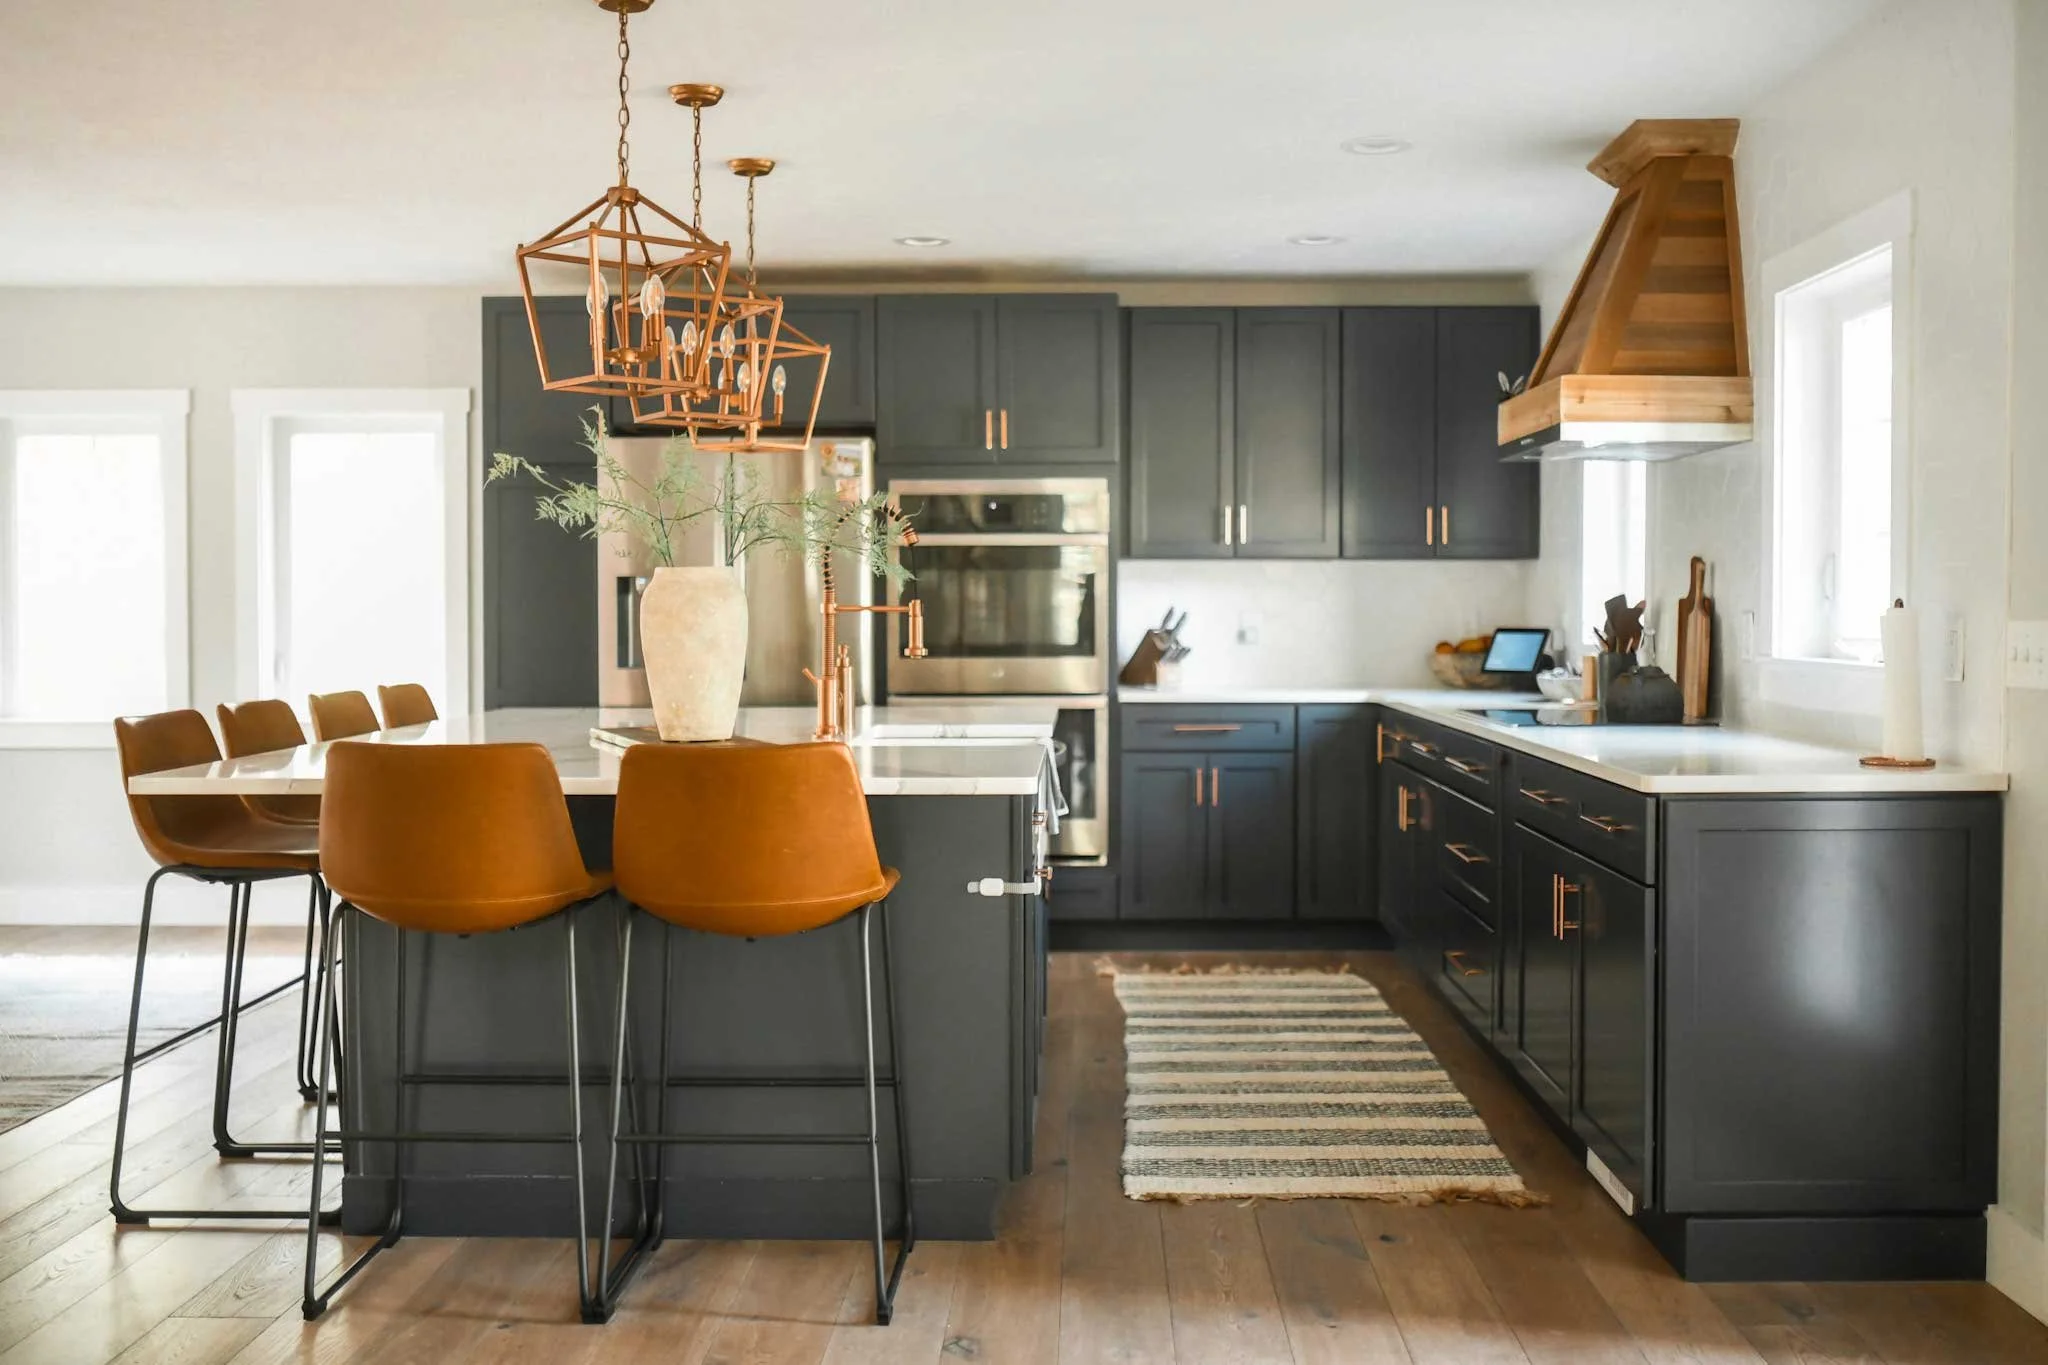
As far as all the finishing touches go, like decor, I kept to a clean and minimal look as best as I could. I truly love an empty counter, so it was important that commonly used appliances were stored in one of our large cabinets or in the pantry (where our toaster is). We pull them out when we need them and put them away when we’re done.
During the design phase for the cabinets, I also specifically requested a shelf in the island for our microwave so that it didn’t have to be mounted on the wall or take up counter space - it’s directly across from the fridge. I like that the kids will have access to it when they’re self sufficient without needing to pull up a chair or stool that they most likely won’t put back haha.

We waited a long time to make this space come together, mostly to ensure our triplets would be at an age where they could understand discipline for their own safety. As any parent knows, adding new furniture or potential climbing objects is a magnet for young toddlers, but 2.5-3 was definitely the magic age where they’ve done really well leaving all the new chairs alone.
I’ve linked most everything I could find or remember throughout this post, but if there’s anything missing, feel free to drop a comment and let me know.
I hope you’ve enjoyed seeing our kitchen reveal!
Professional web developer & designer with a passion for crafting, DIY, and all things Pinterest.